Your first flow
You will build the smallest flow that really runs — Start → Click → Stop — and watch your emulator tap a button by itself. Use any app already on the emulator; the built-in Settings app works fine. About ten minutes.
The app in 60 seconds
Everything lives behind four navigation tabs:
| Tab | What it is for |
|---|---|
| Instance Dashboard | Your emulators and their queues. Runs start here |
| Flows | Every flow you have saved |
| Scheduler | Run flows automatically, later |
| Edit Flow | Appears while a flow is open in the editor |
That is the whole map. Now build something.
1 · Put a target on screen
On the emulator, open any app with a clearly visible button — Settings, a game menu, anything. That button is what your flow will tap.
2 · Build the flow
Flows → Create New Flow. The editor opens: node toolbox on the left, canvas in the middle, properties on the right — and Live Preview, the emulator's live screen, which is where you point at things instead of typing coordinates.
- A Start node is already on the canvas. Every flow begins there.
- From Actions, add a Click node. Name it after what it taps —
1. Tap Battery. - In its properties, choose Select Click Region and draw a box on Live Preview around your button.
- From Control, add a Stop node. Set its status to
successand its message toTapped it. - Wire the ports: Start → Click → Stop.
- Save, and give the flow a name — double-click the title to rename.
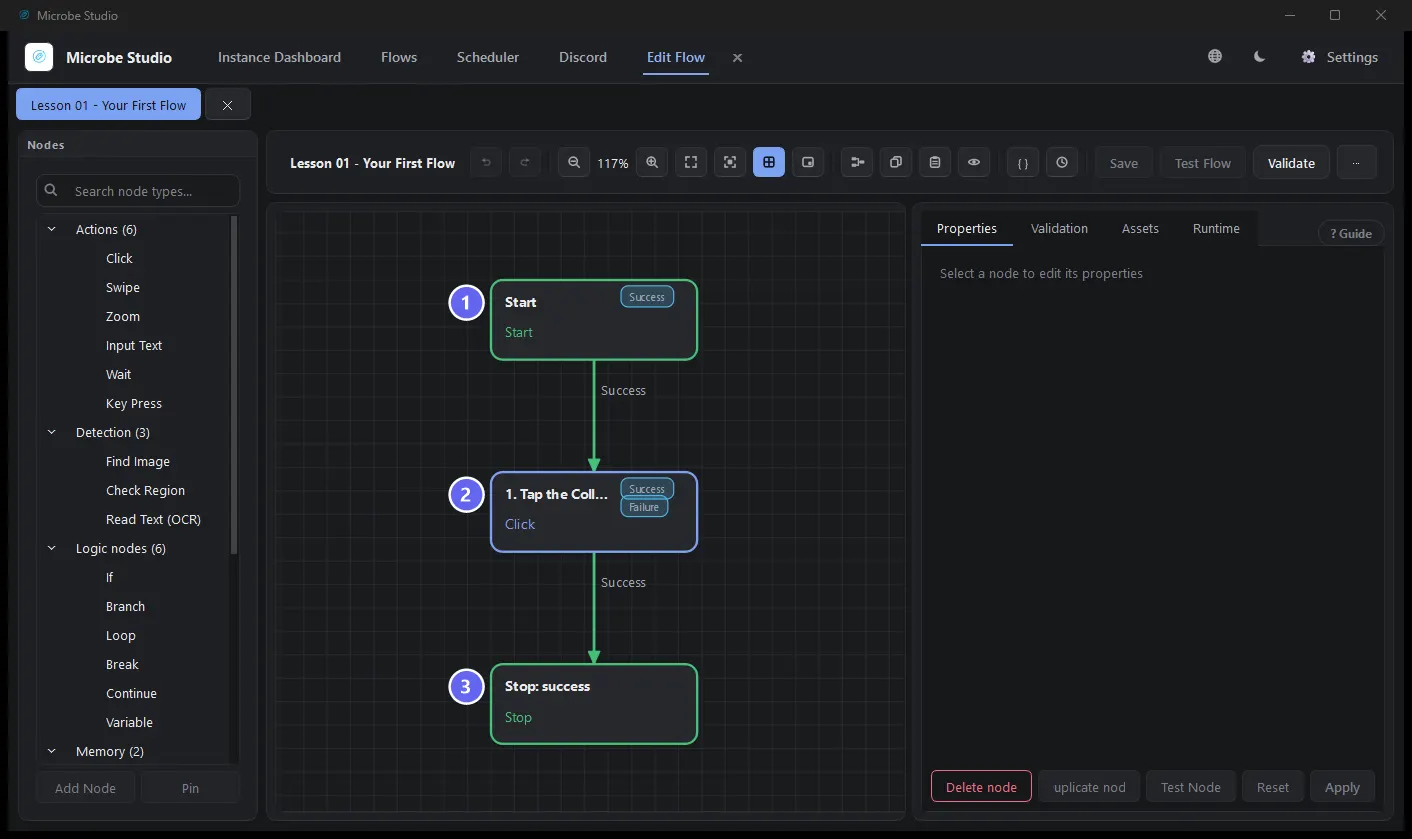
The same shape, built in the editor: Start, one Click, one Stop.
3 · Run it
The quick way is Test Flow in the editor toolbar — it runs the open flow on the attached instance.
But do it the way real runs happen, because this is the loop you will live in:
- Open Instance Dashboard and select your instance.
- Add Flow → pick the flow you just saved.
- Make sure its checkbox is ticked, then press Start.
Watch the emulator: it taps your button, and the run ends with your message — Tapped it — in the log.
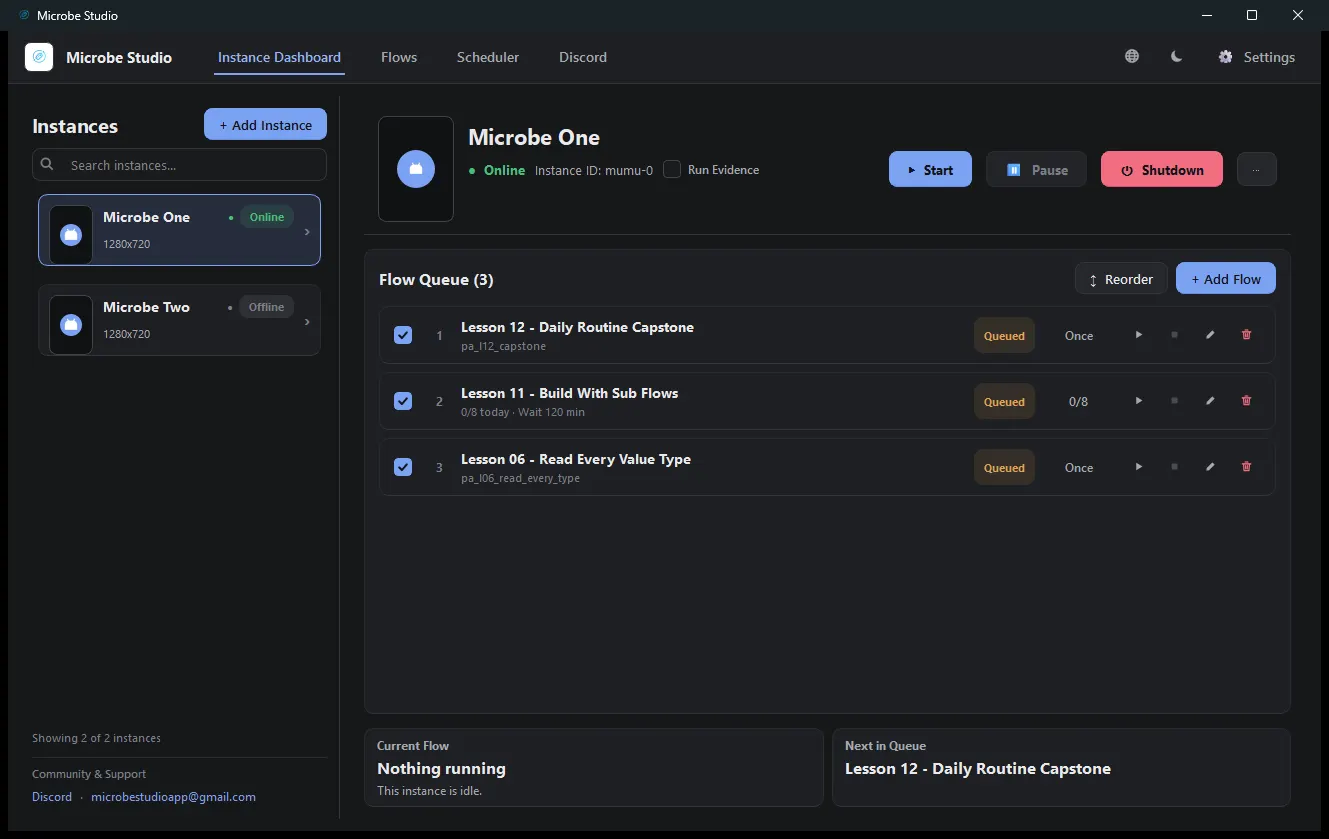
What just happened
Three ideas carry everything else in this product:
- Nodes act, edges decide. Each node does one thing and reports how it went; the wires you drew decide where the run goes next.
- You pointed at the screen, not at coordinates. The region you drew is stored as percentages of the screen, which is why flows survive on other machines.
- The queue ran it. An instance runs one flow at a time, in queue order — that is the model everything from scheduling to scaling builds on.
If it did not work
| Symptom | Cause | Fix |
|---|---|---|
| Instance missing from the dashboard | Emulator not running, or CLI path wrong | Connect the emulator |
| The tap landed somewhere else | Region drawn around the wrong spot | Redraw it on Live Preview |
Run ended with TRANSITION_NOT_FOUND | A port with no wire | Wire Start → Click → Stop completely |
Anything else: Debug a run that failed.
Next
You can build and run. Two good directions from here:
- The flow editor — the tools you just used, properly: testing one node, validating, groups, Auto Layout.
- Automation course — 12 lessons that take this three-node flow to a scheduled, self-recovering routine.